


They really throw out an impressive amount of light.
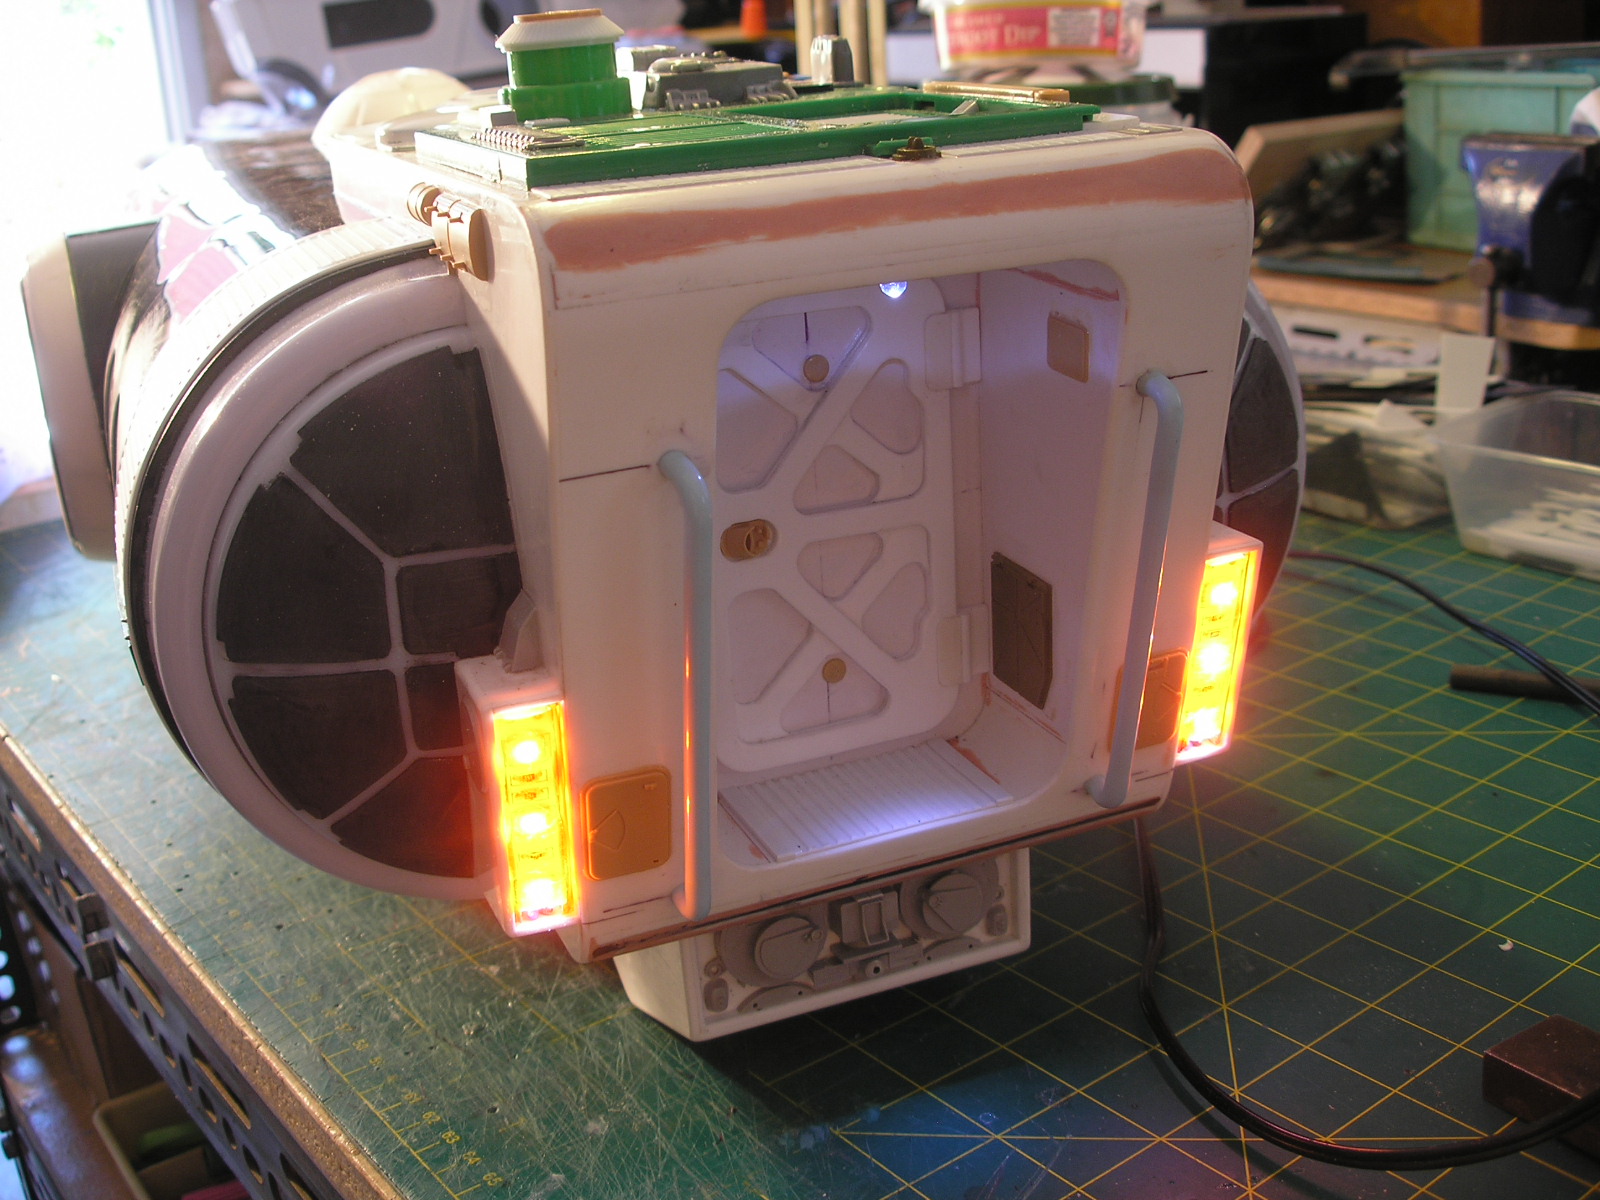
For the front I added a length of the strip to a piece of aluminium angle. A 2mm styrene box was then made to fit over this and secured with a styrene tab at one end and a dual ball cabinet catch at the other. A small 3 led strip has been added to the cockpit interior as an overhead light.


The rear lights were made from a two 3 led strips painted with Tamiya clear red. A similar styrene box, made to secure in the same way as the front, hides the wiring connection at the rear. Some kit part detailing has been added. A single white led has been added to the rear porch to light the rear hatch. A 1k resistor was calculated to be correct to run it from the 12volt lighting circuit.


To power the the lighting I will need a voltage booster to get 12 volts from the 7.2 volt motor battery.
The leds don't pull much current so I should be able to use a booster from Hobby King with no problems.
More soon...
Part 1, Part 2, Part 3, Part 4, Part 5, Part 6, Part 7,


No comments:
Post a Comment